
If you have never tried, you should. These things are fun, and fun is good. Dr. Seuss
I am no scientist when it comes to dyeing. For me, it’s more like a serendipitous surprise what comes out of my dyepot. I don’t measure the dye or the water in the dyebath, I don’t check the temperature, I don’t fiddle
with mordants (other than the ones that come in the dye products). I have a lot of go-to favorite colors, but even then, there can be wonderful surprises. And that’s fun!
As a rule, I try not to dye the exact colors needed for my repair projects. It’s a challenging process, which sometimes takes 4 or 5 attempts to get something that’s exactly right. That part just isn’t fun for me! Part of my approach to repairing old rugs is avoiding that tricky step altogether whenever possible.
I probably dye at least 40 pounds of yarn a year, but for me, dyeing happens at a different stage in my creative process. I dye lots of colors, and they go up on the shelf in my workshop. That becomes my color palette. From there, I can choose from a multitude of colors and shades for my projects.
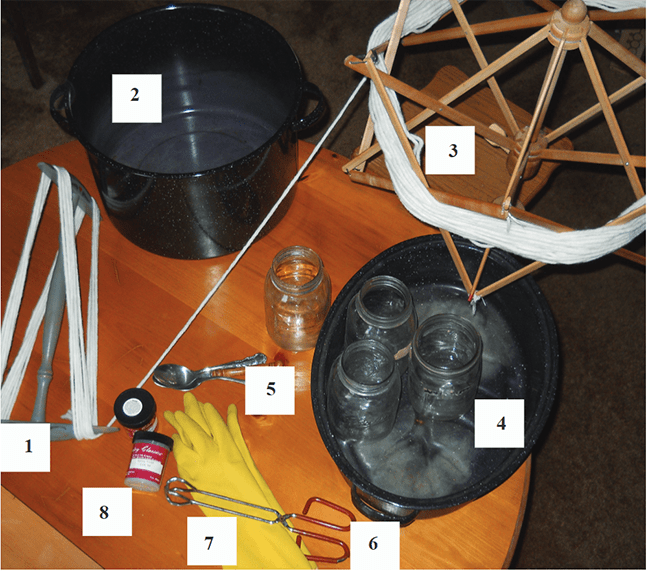
Useful supplies to have on hand for working with yarn:
- Niddy noddy for wrapping skeins
- Dyepot
- Swift (for unwrapping skeins)
- Roasting pan and mason jars for dip-dyeing
- Spoons
- Tongs
- Rubber gloves
- Dyes
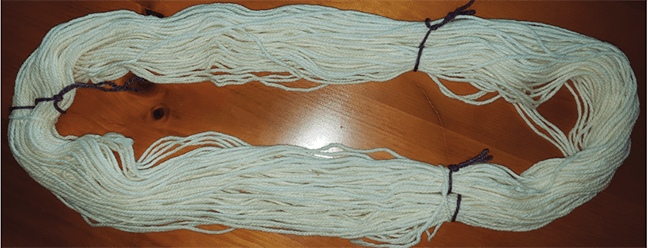
Cross-tie your skeins at least three times, with a figure 8 wrap. I use acrylic yarn for the cross-ties, because it won’t absorb any dye, so it’s easy to find them to lift the skeins.
Dyeing yarn a solid color:
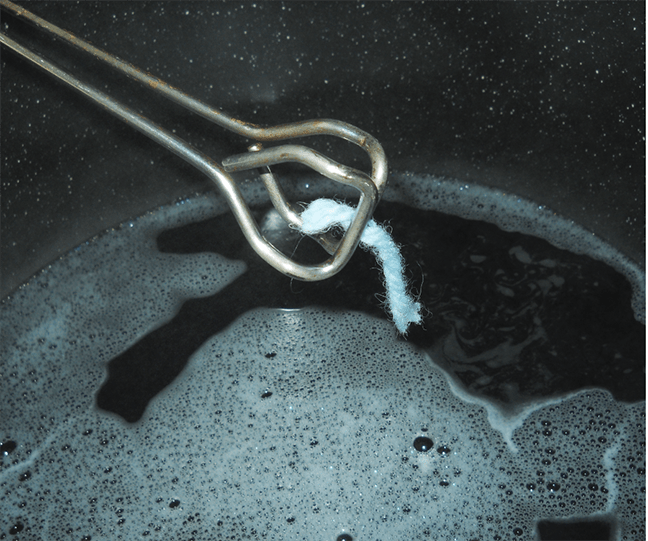
Fill your dyepot with cold water (enough that your yarn will have plenty of room to move around). Cover it and bring it to a boil. I usually start with less dye than I think I will need (it’s easier to add more dye than to take it away). Then I put a small piece of yarn into the dye for a couple of minutes. If it’s too pale, I add a little more dye and test again. When I’m satisfied with the color in the pot, I lower my cross-tied skeins into the dyebath. Go slow, and gently push them down until all the yarn is covered (below).

Every once in a while, lift the skeins up out of the dyebath, and let them fall back in. That way, you get an even dye, without light spots.
Rinsing the yarn:
I fill another enamel pot with the hottest tap water I can get. After I have filled the pot, I add a splash of dishwashing liquid. Add the soap after you have filled the pot because you don’t want too many suds.
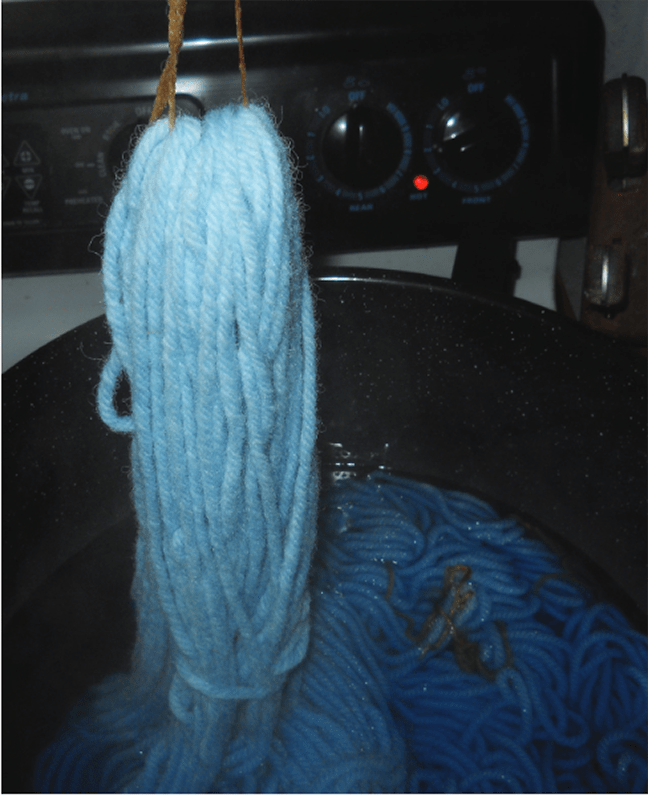
Then I lift the skeins, one at a time. Rubber gloves help to protect your hands, but you still need to be careful (see below).
I transfer the skeins to the soapy pot, then I pour out the original dyepot and rinse the dye out. Then I fill it with hot tap water for the first rinse.
I transfer the skeins from the soapy pot to the rinse pot, squeezing them (not twisting) to rinse out some of the color. When I have transferred all the skeins, I empty the soapy pot, rinse out the soap and fill it again with hot tap water. For the final rinse, move the skeins over in the same way to the final rinse pot. Then I squeeze out some of the water from each skein (below).

To save on energy, if I’ll have time, I hang the hot skeins out on the fence to cool. Then when I’m ready to rinse them, I don’t have to use really hot water anymore. The skeins will be damp and cool, so I’ll fill my rinse pot with cool water.

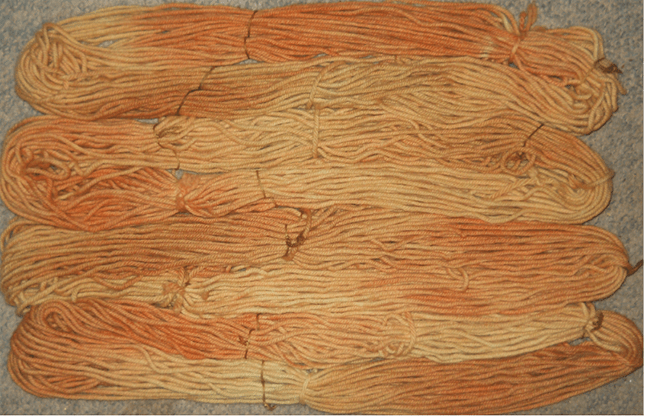
If you want a variegated effect, you can either cram more yarn into the dyebath, or use less water. Push the yarn down quickly, and then don’t move it at all while it’s setting. The yarn in the picture above is crammed in pretty tight. Below, you can see the effect. When I hook with this kind of yarn, I have choices on how I want to use the variegation. I can hook in rows outside the design features, like an echo, or hook in straight lines, for a woven or tapestry effect. Or I can just hook in random blobs. In any case, I let the yarn change colors as I go.
Wuzzing:
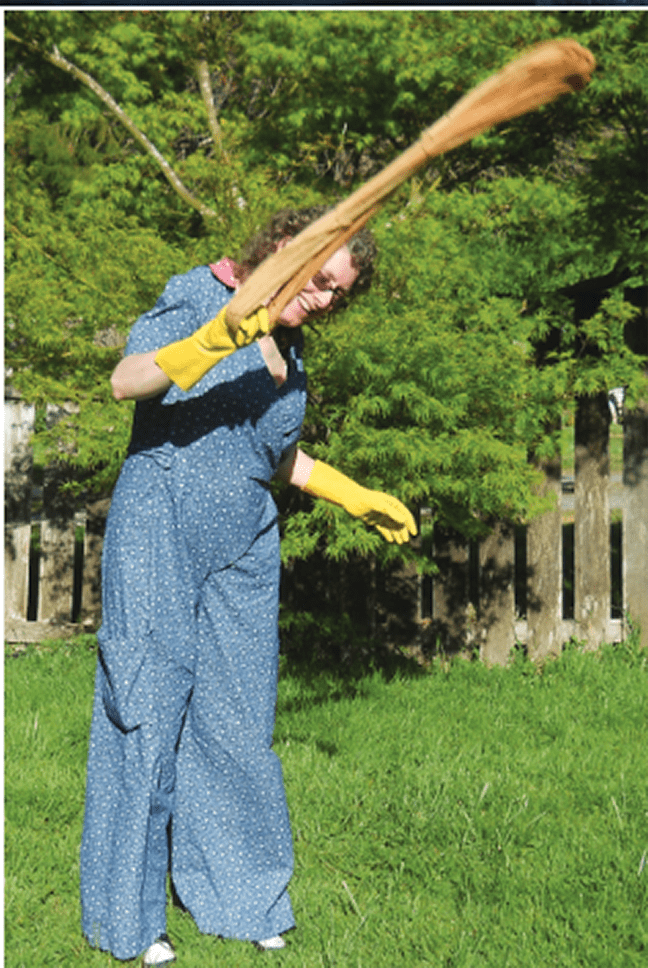
Wuzzing is the olde tyme word for getting most of the water out of the wool. The easiest way to wuz the yarn is to put it in your washing machine on the Drain & Spin cycle (NOT the Rinse & Spin!). If your machine doesn’t allow you to just do that part of the cycle, you can do it the old fashioned way. Go outside, grab a skein by one end and swing it around ten or so times. You can get rid of a lot of water that way, and get a pretty good arm workout at the same time!
Then just lay your skeins to dry on a towel. They should be dry by the next day. Or outside on a sunny day, they’ll dry in two hours or so.

To hook with yarn, you need to wrap the yarn into balls. You can buy a ball-winder, but I just keep it simple and use my hands! To begin, tuck the end of the skein under your thumb. then start wrapping the yarn loosely around your fingers.
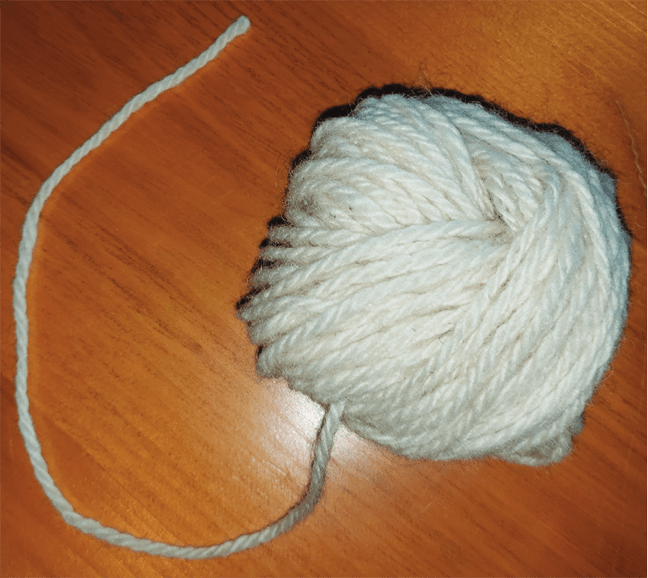
When you have what you need wrapped around your fingers, slip the ball off your hand, then wrap around the outside several times. Tuck the final end of yarn under the wrap. When you hook, you will use the first end (the inside of the ball) so it won’t roll around while you’re hooking.

Block Party Rug before, 23.5”x30.” Natural colored wool yarn on linen.
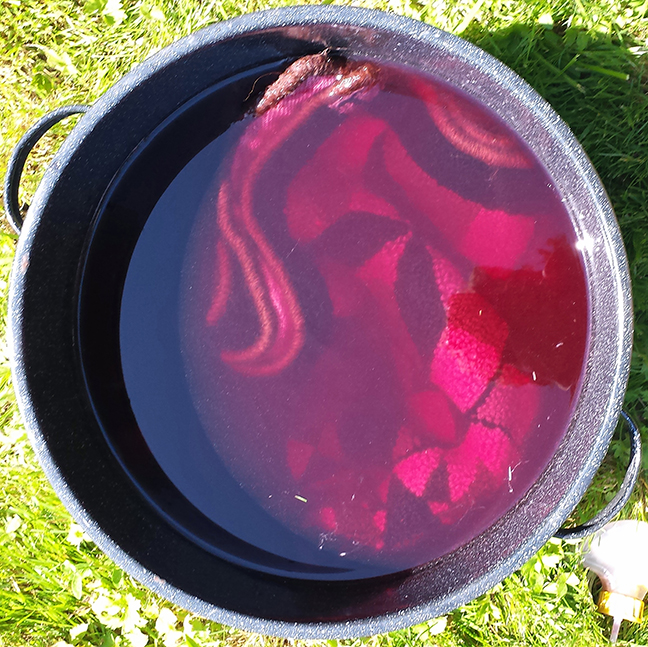
Here’s a rug that turned out drab. It just didn’t look good in my booth next to all my other rugs. So I decided to overdye it. Not to obscure the colors, just to bring them all together in a harmonious color scheme. I soaked the rug in water out in the yard, and brought a spray bottle and dye.
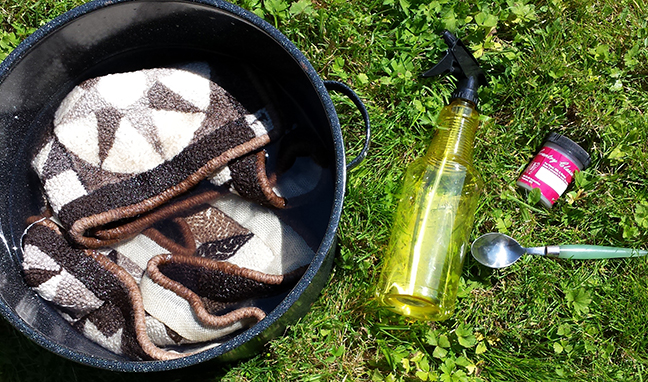
I mixed dye in the spray bottle, and slowly sprayed the rug, top and bottom. I wanted to try to get the dye spread out evenly all over the rug. Once I had applied enough dye, I filled up my dyepot with clean cold water, and gently dropped the dye-soaked rug in the pot.

Remember, you never want to shock wool yarn from cold to hot (or hot to cold) when it’s wet. We don’t want the rug to get all felted like the Mattie rug!
This way, the water will be brought slowly to a boil, so no harm at all to the yarn.
If you’re going to try something like this, it will only work with a small rug (small enough to fit in your pot) and only with rugs hooked on linen or cotton.
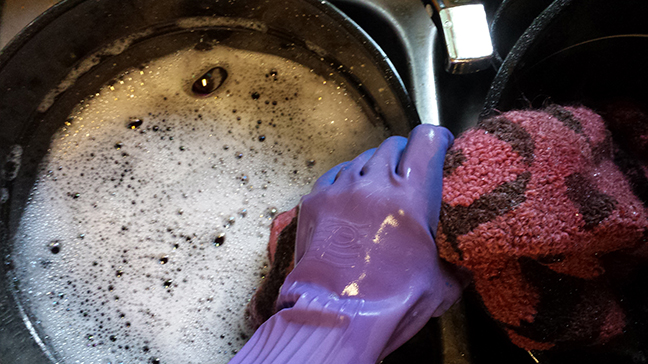
I rinsed the rug the same way I rinse the dyed yarn. I filled another pot with hot water, added a splash of dishwashing liquid, and transferred the rug over, squeezing it, not twisting it. I passed it through two hot rinse pots, wuzzed it in the washing machine (drain & spin cycle only).
But yikes! I had tried to lift the rug a couple of times in the dyepot, but I missed a section. Not to worry, though, I just treated it like any other stain.
I overdyed some of the yarn I used making the Block Party rug and rehooked the stained area. I realize that not everyone is going to resort to such drastic measures, but I wanted to share the process with you, so you would know what’s possible. It’s just a rug. If it’s gotten drab, stained, or it clashes with your furniture, why not?

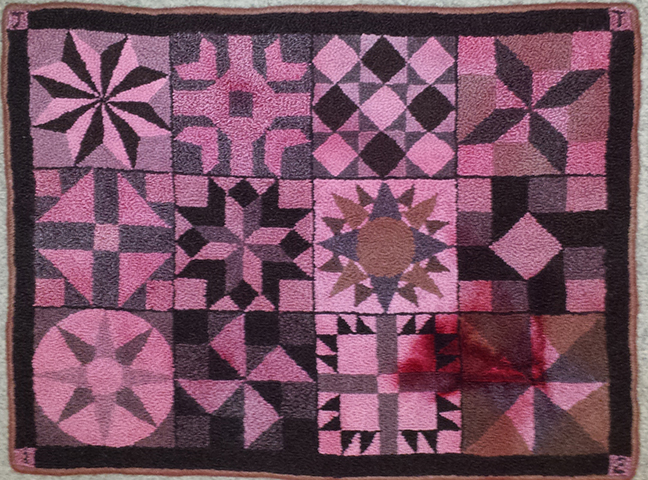
Block Party Rug, 23.5”x30.” Natural colored wool yarn on linen, overdyed.
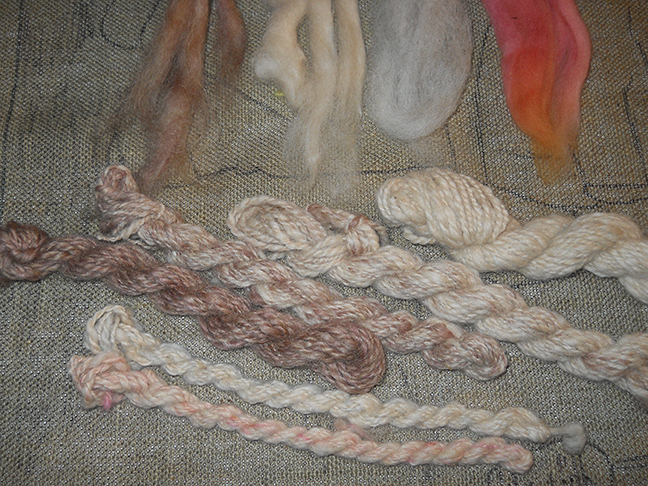
The more you learn about what yarn can do, the easier it will be for you to recreate the colors and textures of old rugs.
Wool can be blended in the spinning process to create subtle shading. In the picture above, you see the unspun wool on top, and all the different shades I got by blending those colors to hook the skin tones in the portrait below.

I overdyed light, medium, and dark yarns for the jacket.
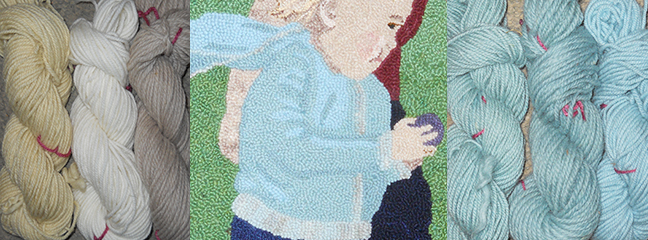
I did the same overdyeing process for the little girl’s jeans, using a darker blue dye.

Then I blended different colors of wool and spun up the colors for the grass. Sometimes, you can get a better match for the original rug than you can by just dyeing new wool or yarn.

The Great Easter Egg Hunt, 23″x32.” Hooked with overdyed yarns, and handspun blended yarns. Designed and hooked by Judy Taylor
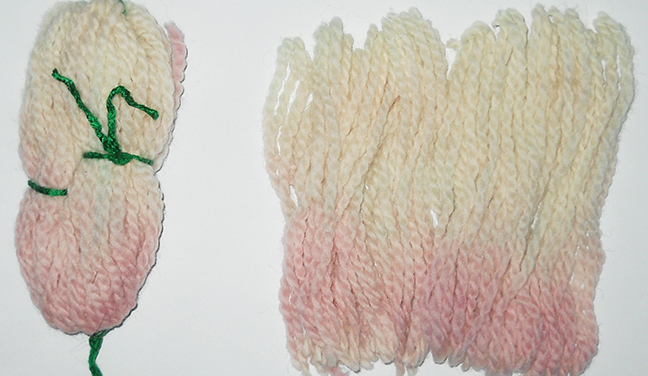
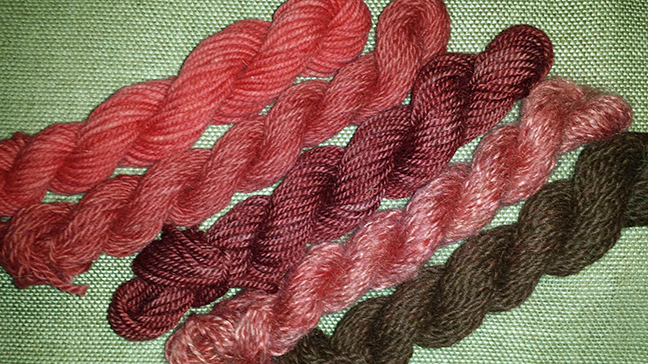
If your repair involves shading, you can dip-dye yarn just like we do with wool fabric.
There are many more dye effects in Rug Hooker’s Guide to the YARNIVERSE! that will help you when doing rug repairs.
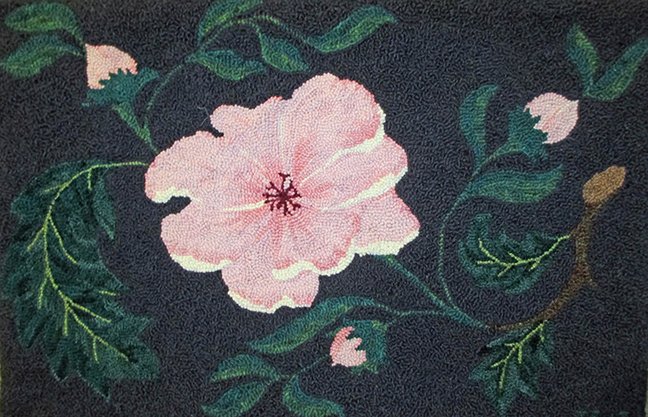
Serendipity, 20.5”x30.5.” Dip-dyed wool yarn on linen, designed and hooked by Judy Taylor

For more tips and techniques to help you in your repair adventures, click here!
And join us on Facebook Repairing Hooked Rugs. There you’ll find dozens of rugs in need of your skilled repairs!
Click here to subscribe to Little House Rug’s monthly blog, Hooking With Yarn.
Thank you for reading! Let me know if you have any questions!

Judy Taylor
littlehouserugs@hotmail.com
http://www.littlehouserugs.com
